COMPREHENSIVE GUIDE

The Ultimate Guide to Asphalt Driveway Repair

Asphalt driveway repair is a crucial part of home maintenance. It is important to keep up with annual maintenance if you want to preserve the life of your asphalt while protecting your home's curb appeal. Treated properly, an asphalt driveway can last up to 30 years without needing replacement. If you stay on top of repairing driveway issues early, you can avoid the cost and stress of a full replacement. So where do you begin?

Do You Need to Repair Your Driveway?

Here is a free, fast, and easy test you can try at home. Pour some water on a well trafficked part of your blacktop driveway and watch what happens. If the water beads on the surface, your asphalt is in good shape. If it does not, you have problems you should address with asphalt driveway repair as soon as possible. If water is seeping into the asphalt, it is causing damage that will lead to more costly asphalt driveway repair later.

In warm seasons, water will erode the pavement and the foundation, which causes it to crack. As the weather gets colder, a freeze and thaw cycle will begin, and the expansion and contraction will increase the size of the cracks. As the foundation becomes compromised, you go from spending a few hundred dollars repairing driveway problems to thousands of dollars replacing the surface.

Aside from the water test, look for obvious signs of trouble. Cracks in the driveway allow vegetation to spring up, which further erodes the foundation. Potholes will eventually form if the cracks are not treated, and they are another sign of trouble. A badly faded sealcoat surface where all the stone aggregate is showing is another sign that it is time to sealcoat. Heat, grease, gas, oil spills, and salt stains all work to eat away at your driveway. The good news is that a fresh coat of sealer can protect your driveway for years and extend the life of any asphalt driveway repair you complete. It also cuts down on how often you are repairing driveway damage later.


What is Asphalt, Anyway?

Asphalt is a tar-like material found in petroleum deposits.

When heated and mixed with crushed rock and other substances, it becomes a relatively smooth surface that can support even the heaviest of vehicles. It is commonly used on public roads, as well as on the driveways of many private residences. Asphalt is similar in chemical composition to motor oil and gasoline. If these liquids are spilled on the surface, they bind with it and leave stains that often require extra attention when repairing driveway damage.

Sealing is the only way to ensure that your driveway looks as good as it can for as long as it can. Driveways that are not sealed develop cracks faster and need to be replaced sooner. Choosing the right sealer, and applying it correctly, turns into one of the smartest asphalt driveway repair investments you can make around your home. It keeps you from repairing driveway surfaces more often than necessary.


Why Does Asphalt Crack?

Everything from earthquakes and freezing temperatures to tree roots and poor asphalt maintenance can cause asphalt to crack.

Sealing with a professional grade asphalt sealer is one of the best ways to prevent cracks from occurring in the first place.

Traffic, UV exposure, and standing water will slowly break down the binder in the pavement. Small hairline cracks become larger, and once water gets into the base, the damage accelerates. If you address these problems with timely asphalt driveway repair, you reduce the risk of potholes and trip hazards forming in front of your home. Regularly repairing driveway cracks before they widen is far cheaper than waiting for structural damage.

When Should You Seal Your Driveway?

For brand new driveways and parking lots, it is important to wait at least 90 days for the material to be fully cured and hardened before sealing the surface. Once the 90 days have passed, seal the asphalt as soon as possible so that future asphalt driveway repair work is easier and less frequent.

After the initial coating, you should seal whenever you repair cracks or potholes. Higher quality asphalt driveway sealer will last for three to five years before a new coat is needed, depending on the amount of traffic the area receives and the level of UV damage it gets.

Low quality sealants may need to be replaced more often. These products cost less at the start, but they need to be replaced more often. The layers will start to crack, flake, and peel much sooner than the better quality products. The higher quality sealants are worth the money, especially if you do not want to keep repairing driveway surfaces over and over.


Summer is the best time to seal. In general, the temperature must be above 50 degrees for the sealants to cure properly.

Should Sand Be Mixed With the Sealer?

Most professionals recommend an asphalt driveway sealer that has sand mixed in with it. The sand improves durability and traction so you get a safer walking and driving surface after your asphalt driveway repair.

How Long Does it Take for the Sealant to Cure?

The cure time depends on the type of sealcoating you decide to use. Most professionals recommend waiting at least eight hours before driving your car on the coated surface. In the cooler months, it may be necessary to wait for 36 hours with our sealer. With many hardware store sealers, drying time is between 36 and 72 hours.

When Should You Choose Commercial-Grade Sealer?

Commercial grade sealants are required for airport runways, and they are also needed in parking lots with higher traffic levels. If it is good enough for a busy mall, you can be confident that a commercial grade asphalt driveway sealant will do an excellent job on your residential asphalt driveway repair project too.

Learn More: Enroll In Our Free Course

Free Homeowner's Driveway Maintenance Course


Register Now

Learn which products you need and which items from around the house will help you get the job done right.

Visual Guide to Driveway Repair

The-Driveway-Repair-Process

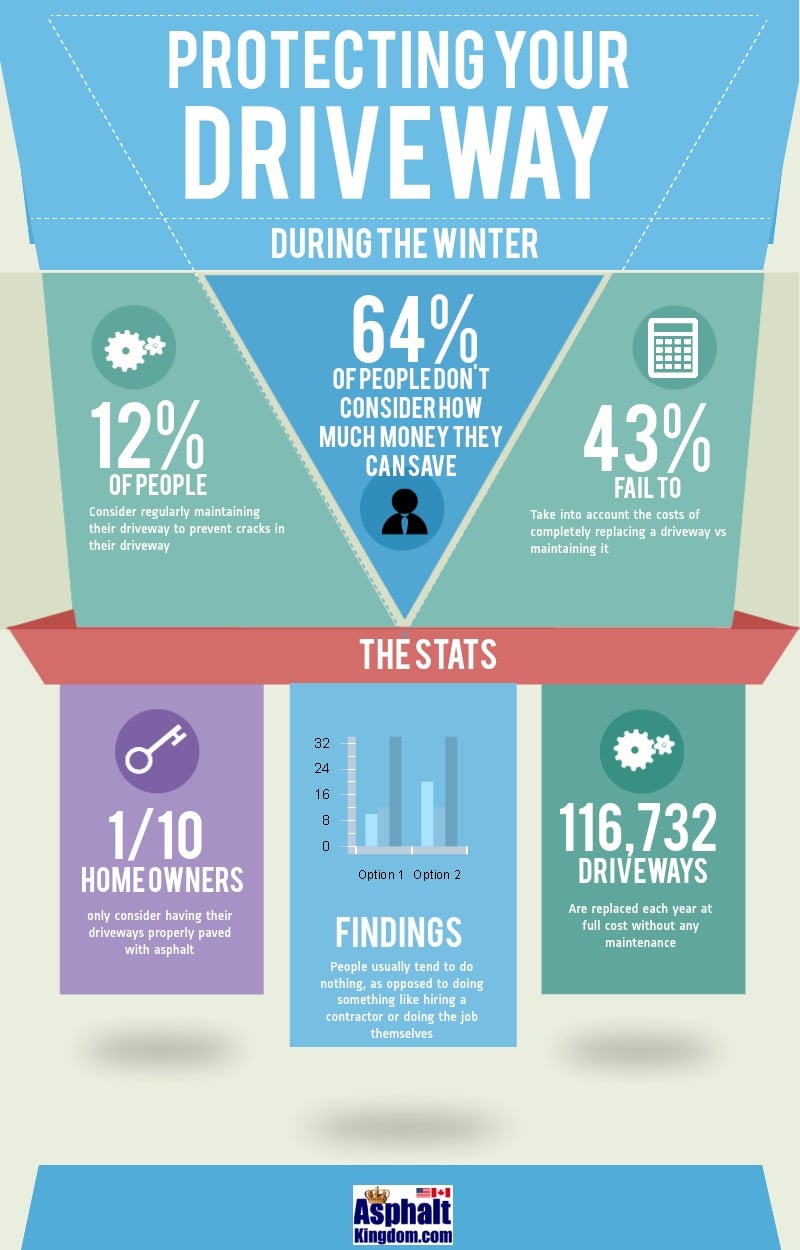
Use this visual guide as a quick checklist when you plan your next asphalt driveway repair so you do not miss any steps.

How To Do Your Own Driveway Repair: A Step-By-Step Guide

With a few simple steps and asphalt driveway repair products, you can bring your blacktop back into shape and, more importantly, prevent further damage. Begin by checking the weather. Ideally you will have two sunny days in a row and temperatures that do not dip below 50°F. Once you have picked your day, pick out an old outfit. Crack filler and sealer permanently stain clothing and shoes.

There are four steps to repairing driveway surfaces correctly.


Step #1: Clean the Surface

  • Sweep or pressure wash to remove all grit and debris. A wire brush is also a great tool for removing debris. If you pressure wash, make sure to allow time for your driveway to dry before crack filling.
  • Clear all weeds, sand and loose gravel from the edges and any cracks or holes. If you do not kill the weeds in cracks, they will sprout up again. Use vinegar to kill weeds effectively in an eco friendly way.
  • Remove all fuel stains from your blacktop with a degreaser. Sealer will not sit well on top of oil or gas, so treating stains is a key part of repairing driveway surfaces that have had vehicle leaks.


Step #2: Fill Cracks and Potholes

Do not skip this step. Asphalt sealcoat can repel the elements, but it needs to be applied on a sound surface, and that means filling in cracks and holes. It is a simple process and a big part of any asphalt driveway repair plan.

Crack Repair Materials:


Pothole Patching Materials

  • Cold asphalt patch for large holes
  • Gravel
  • Sand
  • Plywood, large enough to cover the area
  • Oil, for the bottom side of the plywood to stop sticking
  • Car


Step #3: Repair Driveway Damage


Crack Filling

DIY Crack RepairIf you are using cold liquid crackfiller, shake it to ensure it is thoroughly mixed, and then fill the crack flush with the top of the asphalt surface. You do not want to overlap too much or the sealed areas will show through the sealer.

If you are using hot rubberized crackfiller, heat your melter or kettle and insert the brick of crackfiller. If you are using Asphalt Kingdom's Crack Fill, you can use a direct fire kettle or an oil jacketed melter. Cheaper crack fill products can only be used in an oil jacketed machine.

Once the product is melted, apply it at a walking pace over all your cracks that are a half inch wide or smaller. Note: If the crack is wider than a half inch, or if it is deep, you should first top up the crack with a mix of gravel and sand packed firmly in the crack. Fill to within a half inch of the asphalt surface, and then fill the rest with hot pour crackfiller.

Allow time to cure for a few hours before sealing. This step is essential if you want your asphalt driveway repair work to last through multiple seasons.
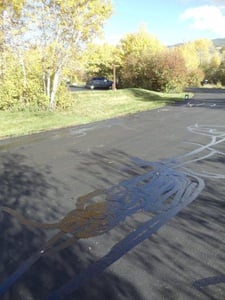
 

Pothole Filling

Pothole filling is key to preserving your driveway's lifeYou should have already cleaned the edges of the pothole during your cleaning session in step one. If you have not, make sure you do that now. Then cut open the bag of asphalt patch and pour it into the pothole. Our cold patch asphalt repair product will fill a hole one inch deep and four feet in diameter.

First apply and force the fill product into all the voids, making sure it is tightly packed. Then add more so it is slightly mounded above the surface of the blacktop. Now cover the area with the plywood, oiled side down. Drive over the wood with your car to firmly tamp down the crack filler and asphalt patch.

Asphalt Kingdom’s 12.5 gallon applicator is one of the best hot pour crack filling systems on the market. It is capable of filling 25 feet of cracks in just 15 seconds

Once the patched area is compacted and level, you are ready to move to the sealing stage of your asphalt driveway repair project. Sealing soon after repairing driveway potholes helps lock out moisture.

Step #4: Seal, Protect, and Beautify

The next step in the asphalt driveway repair process is to seal the patched and filled surface, providing a layer of protection from the elements and greatly increasing your home's curb appeal.

AK_Blog_SealingAsphalt

  1. First, tape off the driveway, sidewalk, house walls, or anything else that borders your driveway that you do not want to get sealer on.
  2. You can save time by having someone move with a stiff piece of cardboard, holding it against things you are trying to protect while sealcoating.
  3. Next, stir the asphalt sealer until the consistency resembles a thick soup.
  4. If you are using an asphalt sprayer  to spray the driveway, begin by trimming the driveway using a finer spray tip. Once all the edges are done, switch to a wider tip and begin spraying from the right to the left.
  5. If you are sealing by hand, pour a one foot wide puddle of sealer across the top of the driveway. Use your asphalt squeegee to spread the sealer in a push and pull motion, working until the sealcoat is between three and four feet wide and evenly dispersed. Repeat the process, moving down the driveway.
  6. If you are using sand, now is the time to sprinkle it over the driveway in a light and even coating. This improves traction and finishes off the asphalt driveway repair so it looks clean and professional.

Important Tip: Use two thin coats instead of one thick coat, allowing the first coat to dry for several hours before applying the second one.

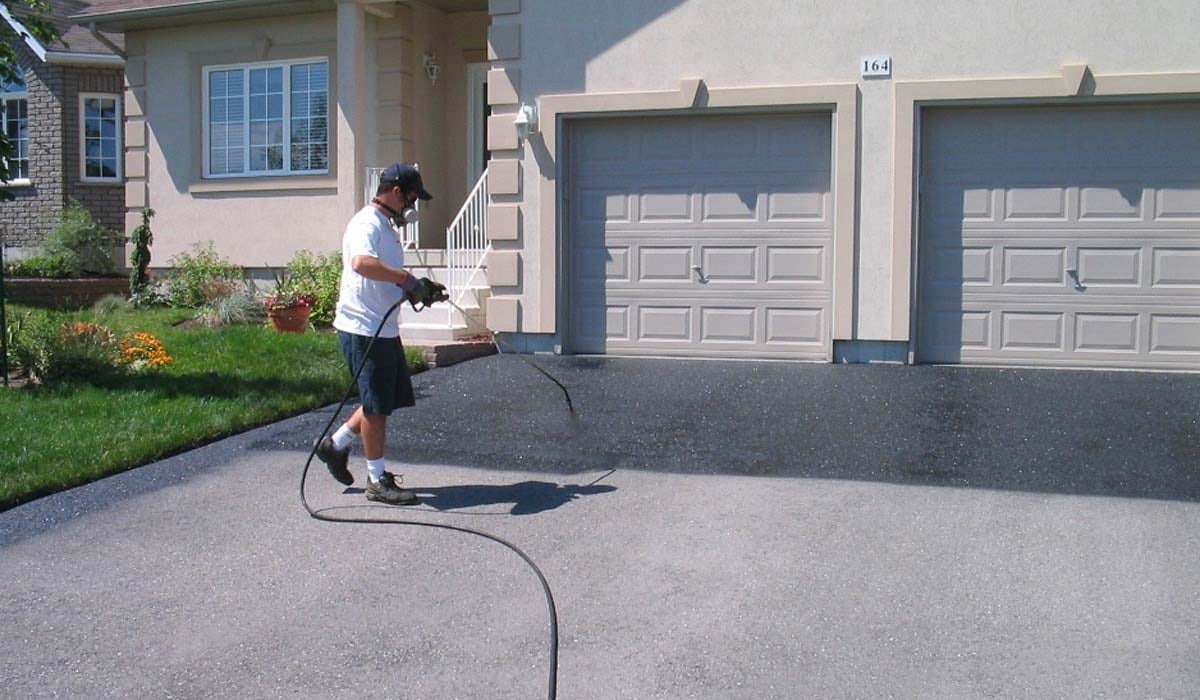
Tape off the area with caution tape and allow it to dry for at least four hours before you walk on it and at least eight hours before you drive on it. Letting the area dry overnight is best, especially after a full day of repairing driveway surfaces and sealing.

Choose a Spray System if...

  • You have a large driveway, where more than six cars fit
  • You have neighbors who would also like to seal their driveways
  • You are short on time. A sprayer is four times as fast as sealing by hand

Choose a Squeegee if...


  • You are only planning to seal your own driveway
  • You are concerned about budget
  • The area to be sealed is small

Maintaining Your Driveway

After all your hard work, it is important to maintain your driveway going forward so that your asphalt driveway repair efforts last as long as possible.

  • Watch for hairline cracks. These can be addressed with sealer if you catch them early enough.
  • Inspect your pavement for puddling after a rainstorm. These depressions are the most vulnerable to damage as water sits and possibly freezes. Top up any depressions with cold patch. Tamp it down with oiled plywood. Allow the patch to cure, then sealcoat the driveway to seal it in.
  • Keep an eye out for weeds growing out of cracks in the asphalt surface. These are a sign that your cracks need to be cleaned and filled to prevent damage going forward. Staying proactive about repairing driveway damage will help you extend the life of your pavement and protect your curb appeal. A few minutes each season spent repairing driveway trouble spots will save you from major resurfacing bills.

Protecting-your-driveway-during-the-winter1

Your One-Stop Asphalt Maintenance Shop

Shop Equipment Shop Equipment